What to do Next

AA Ford Discussion Group relating to the repair and restoration of your AA Ford.
User avatar
pyrodork
Posts: 166
Joined: February 21st, 2012, 4:10 am
Body Type: AA Stakebed
Model Year: 1930
Location: Minneapolis, MN

Re: What to do Next

Post by pyrodork »

Jazzjr wrote:Remove the Top of the Distributor Cap, rotate the engine with the crank or have some one help you bump the Starter, until the Rotor comes in line with the next pin in the Distributor Body. The Firing order is 1-2-4-3 then test each cylinder. It turns in a Counter Clock Wise Rotation.
The Photo below shows how to set the Timing, so put the center of the rotor, across each pin to obtain Top Dead Center (TDC)
i've been looking for an image like this for months!
so when i set the timing; timing pin in the indent, i place the rotor in the position of the dotted outline or as it shows in the photo?
Rumored to be an Early '30 AA...

"Pics or it didn't happen."


-- Scotty "It-Only-Sounds-Like-I-Know-What-I'm-Doing" Petersen, Esquire.
User avatar
spectria
Posts: 1874
Joined: May 15th, 2008, 9:53 pm
Body Type: Mail Truck, Stakebed
Model Year: 1931
Location: Quincy, Ca.

Re: What to do Next

Post by spectria »

JPP wrote:Ok, now I tested all the cylinders at top dead center and all four cylinders leak through the oil fill tube. So does that mean rings for all four cylinders? How do I determine what size rings to buy? Does my test tell me my valves are ok?
1) "So does that mean rings for all four cylinders?"
No, not exactly, You should expect some Leak Down (or air flow), and by a given Percentage. If it is even leakage across all four this usually means simple wear or gummed up rings, and sometimes letting the cylinders soak with Diesel or Kerosene or Marvel Mystery Oil or ATF will unstick rings and improve your compression.
There is a point in crank rotation where all pistons will be part way down on an inline 4. I would fill each cylinder through the Spark Plug hole using a tube to direct the flow into the cylinder Bores and Let it soak for a week or longer, a month wouldn't be too long.
I would drain the pan and leave the plug out and leave a pan under it. You must empty the oil out of the cylinders after they soak good and long. DO NOT crank the engine with the plugs in after this test until you are sure the oil is out of the cylinders.

2)"How do I determine what size rings to buy?" Pulling the head and measuring bore size.

3)"Does my test tell me my valves are OK?" No, I did see where you said you heard air escaping from the exhaust during some TDC leak-down tests. You need to listen at the tailpipe and Carb, try and compare the sound for each cylinder. Ideally you would hear nothing out the tailpipe or the carb, but this is an old engine...

Engine should be warm not hot, you don't want cold air going into and onto Hot Valves...

Here is a YouTube link to a simple "Listen To" Leakdown test: http://youtu.be/YQBzrNNztaE

Here is a link to a YouTube test using a Tester: http://youtu.be/jc3j4ShE-tk

This link is to Google Images for "cylinder leakdown tester"

https://www.google.com/search?hl=en&sit ... rPK9XsP9i8
Dave in Quincy, Ca. I love Pics!!!! Post them All!!! :)
Join the Ford Model AA Truck Club - membership form at http://www.fmaatc.org
JPP
Posts: 161
Joined: July 8th, 2011, 4:36 am
Body Type: 82-A
Model Year: 1929
Location: Townsend,MA

Re: What to do Next

Post by JPP »

Ok, well lots of ideas. I went back and checked the cylinders again. #1=50psi, #2=40psi, #3=40 psi, #4=50psi. Plugs 3&4 oily, plugs 1&2 not so oily. As for blue smoke, not so visible, but my exhaust smells oily. What position does the rotor have to be in to get all four cylinders to be part way down, based on submitted picture? I am off to get Mystery Oil, not driving for a month seems like a lots, whereas I think I can put in a set of rings in a weekend. I never did it but getting the engine out is not that difficult, and then I know its done. Is there something wrong with my logic?
Jazzjr
Posts: 27
Joined: February 6th, 2013, 9:47 am
Body Type: 187-A
Model Year: 1931
Location: Crown Point, NY & Punta Gorda, Fl

Re: What to do Next

Post by Jazzjr »

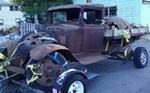
JPP wrote:Ok, well lots of ideas. whereas I think I can put in a set of rings in a weekend. I never did it but getting the engine out is not that difficult, and then I know its done. Is there something wrong with my logic?
Not to Step out of Turn, and Tell you what to Do. But do you Know what's involved with a Model A Motor with Babbitted Bearings?? You seem inclined to Replace the Rings. after Motor is out, Remove the Head, then Oil Pan. You need to use a Ridge Reamer to cut the Ridge at the top of each Cylinder. If you don't cut the ridge, you will break the Piston Glands, removing the Pistons. Maybe you already know this.
When you remove the Rod Caps, mark them, by # and the must go back in the same direction that they came out. Keep track of the Shims, they need to be Placed back where they came from. I put the punch prick marks on the Caps toward the Camshaft. The Pistons have a Split in them, make sure they go back in the same Direction, mark them by #and direction. Buy the right size Rings, you must Hone the Cylinders walls with a glaze Breaker with a Cross Hatched Pattern.
When you replace the Rod Caps You need to Plastia-Gage them to the correct Clearances and right Torque.

The way you say your motor Runs, I would first Pull the Head, then Valve cover, and remove the Keepers and Valve springs, and check the Valve Guides. Then if you think they are OK, Lap in the Valves with Compound, put it back together and see what Happens. Only cost you a Head and Valve Chamber Gaskets. I would bet the Valve Guides are bad and Oil is going by them into the Cylinders. Every body thinks the Rings need to be changed, and doesn't think about the Guides.

If it were my Motor, and it runs as you say, I would Replace with New Parts, Valves, Springs. Guides and Locks, and have the seats Ground. Small investment. Before I tear down the whole Motor, but even so again if it were Mine, I would go as Far to Look at, the Main Bearings and Rods before I sunk any Money into the Motor, you might be lucky and have a good bottom end. Good Luck and Jump Right into it.
JPP
Posts: 161
Joined: July 8th, 2011, 4:36 am
Body Type: 82-A
Model Year: 1929
Location: Townsend,MA

Re: What to do Next

Post by JPP »

I am inclined to take your advice. I have ordered a new valve kit, guides springs, etc. I will pull the head and make the changes, and see what happens. In the interim, I can soak the cylinders with Marvels Mystery oil to see if that frees up some gunk. Thanks for the advice. I will keep you all posted as to my results. I will add pictures as well.
Jazzjr
Posts: 27
Joined: February 6th, 2013, 9:47 am
Body Type: 187-A
Model Year: 1931
Location: Crown Point, NY & Punta Gorda, Fl

Re: What to do Next

Post by Jazzjr »

A better soaking Agent instead of MMO, would be a half and half mixture ATF and Acetone, to help free up Rings and Gunk. But before you assemble the engine, make sure you clean out all of the soaking mix possible, and put 2-3 Tablespoons of at least 30W oil around the Piston Tops, to get them properly lubed for Start-up.

If you don't already have this Book, I recommend you buy it, best $36 dollar investment you can Make.
PS - No location in your Avatar, where do you Live? If you were close to me, or other forum members, we would probably come and offer to help you!

http://www.snydersantiqueauto.com/2167

Image
User avatar
spectria
Posts: 1874
Joined: May 15th, 2008, 9:53 pm
Body Type: Mail Truck, Stakebed
Model Year: 1931
Location: Quincy, Ca.

Re: What to do Next

Post by spectria »

Jazzjr wrote:A better soaking Agent instead of MMO, would be a half and half mixture ATF and Acetone, to help free up Rings and Gunk. But before you assemble the engine, make sure you clean out all of the soaking mix possible, and put 2-3 Tablespoons of at least 30W oil around the Piston Tops, to get them properly lubed for Start-up.

If you don't already have this Book, I recommend you buy it, best $36 dollar investment you can Make.
PS - No location in your Avatar, where do you Live? If you were close to me, or other forum members, we would probably come and offer to help you!

http://www.snydersantiqueauto.com/2167

Image
I agree, adding acetone to any of the penetrents would be better, 'cept it might dissolve a mountain of sludge in your pan.
Best practices would be no shortcuts, tear it all down and get it spotless!
Dave in Quincy, Ca. I love Pics!!!! Post them All!!! :)
Join the Ford Model AA Truck Club - membership form at http://www.fmaatc.org
JPP
Posts: 161
Joined: July 8th, 2011, 4:36 am
Body Type: 82-A
Model Year: 1929
Location: Townsend,MA

Re: What to do Next

Post by JPP »

Guys to be clear, "ATF" is Automatic Transmission Fluid"?
User avatar
fordman88
Posts: 207
Joined: February 7th, 2009, 8:44 pm
Model Year: 1929
Location: Salina, Kansas

Re: What to do Next

Post by fordman88 »

That would be correct
Trevor O Davis
JPP
Posts: 161
Joined: July 8th, 2011, 4:36 am
Body Type: 82-A
Model Year: 1929
Location: Townsend,MA

Re: What to do Next

Post by JPP »

So I changed the valves, and valve guides. Most of the valves showed oil getting past. I got it back together and motor feels much stronger. Icy day so I couldn't take it out for a speed test.
AA cylinder head1.tif
AA cylinder head1.tif (355.03 KiB) Viewed 6311 times
Stakebed
Posts: 1223
Joined: June 14th, 2007, 7:29 pm
Body Type: Grainbox
Model Year: 1929
Location: Illinois

Re: What to do Next

Post by Stakebed »

Cool good to know! yea thier pretty basic engines, not much more than 4 lawnmower engines stuck together.
Jazzjr
Posts: 27
Joined: February 6th, 2013, 9:47 am
Body Type: 187-A
Model Year: 1931
Location: Crown Point, NY & Punta Gorda, Fl

Re: What to do Next

Post by Jazzjr »

JPP wrote:So I changed the valves, and valve guides. Most of the valves showed oil getting past. I got it back together and motor feels much stronger.
By Jazzjr Nov. 25th -- I would bet the Valve Guides are bad and Oil is going by them into the Cylinders. Every body thinks the Rings need to be changed, and doesn't think about the Guides.
Good Job JPP, I'm glad you took my advice, and It worked out for You. Number 3 Intake must have been leaking really bad by the burnt oil deposit on the top of the Piston. You did a good job cleaning her up, looks real good!
I forgot to mention and I hope You had the Head Resurfaced while you had it apart.

Again I can't stress enough, that the Valves and Guides get worn, or burnt, weak springs, then the Motor burns Oil and losses Compression, and others won't do this step first, they want to over look it, all they want to do is Re-Ring the Pistons as a Fix. Now if your still burning oil, at least the Valve Train is repaired.
Did you have the seats in the Block cut (Ground), or did you just lap the New Valves with Compound??
JPP
Posts: 161
Joined: July 8th, 2011, 4:36 am
Body Type: 82-A
Model Year: 1929
Location: Townsend,MA

Re: What to do Next

Post by JPP »

I did lapp the valves for quit a while, and they seems nice and snug. As for machining the head no, I just cleaned it up and emory clothed the sealing surfaces to assure a good seal. The head measured flat and true, as per my methods. I will know this weekend if I gained any speed, but the smell of oil in the exhaust at idle has definitely disappeared. I did learn that the engine was bored out +.005. So if I did want to replace rings, I guess they don't make those anymore. Well if I stop burning oil and it goes to 50 mph, I have what I need. Thanks all for the advice and consultation.
User avatar
Chris Haynes
Posts: 2203
Joined: September 7th, 2003, 5:18 pm
Body Type: 82A
Model Year: 1930
Location: Camarillo, CA

Re: What to do Next

Post by Chris Haynes »

JPP wrote:I did lapp the valves for quit a while, and they seems nice and snug. As for machining the head no, I just cleaned it up and emory clothed the sealing surfaces to assure a good seal. The head measured flat and true, as per my methods. I will know this weekend if I gained any speed, but the smell of oil in the exhaust at idle has definitely disappeared. I did learn that the engine was bored out +.005. So if I did want to replace rings, I guess they don't make those anymore. Well if I stop burning oil and it goes to 50 mph, I have what I need. Thanks all for the advice and consultation.

.010 over rings can be used if you file the end gap for clearance. Pistons can be expanded to take up some slack too. These are old time practices that have been lost in the modern world of throw it away and get a new one.
Also remember that there are companies who make off size pistons and rings for your specifications.
I remember old guys in my neighborhood working on their A's. Removing shims from the bearings to take out too much clearance. These engines were designed to have that done. That is why the bearings were shimmed in the first place.
Knurling pistons to expand their size to allow more use before boring and buying new pistons was common.
There are old time machines and simple fixes kept them on the road for years. These fixes will deliver many thousands of miles before an expensive rebuild is necessary. If your engine is severely worn and you are doing these fixes it would be a good idea to replace the timing gear at the same time.
Removing sludge while the pan is off and cleaning the water passages is a given. ;-)
JPP
Posts: 161
Joined: July 8th, 2011, 4:36 am
Body Type: 82-A
Model Year: 1929
Location: Townsend,MA

Re: What to do Next

Post by JPP »

Sludge all gone, timing gear done three months ago, water jacket air blown, and all sealed up. No leaks, drips or oil drips. Is smoke in filler tube normal?
Post Reply