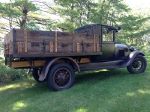
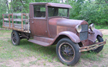
Having a really frustrating time getting my '29 doors apart. Most of the screws are stuck fast and have resisted all my normal tricks of removal so have had to drill a number out. But what has me stumped is how the inside surround for the window comes out. there are three screws in the top which I have out but it still refuses to budge. Is it just sprung in or are there other fasteners that I cannot see? I am scared to put to much force on it as it will probably distort. Also, any tips on removal of door and window handles? I have done what they say in the instruction manuals but they are stuck fast also.
20190504_153221.jpg (764.95 KiB) Viewed 6946 times
Yep they slide up. Hold a piece of oak board against the bottom edge of the piece that goes across the top of the window opening at each corner and drive (tap) the opposite end of the board with a hammer. Work it at each inside corner a little at a time. Don't hesitate to drive it back down after you get it to move. Going back and forth will allow the rust to break loose and find its way out and help move things along.
FYI - I use heat to break loose rusted screws and the door window trim. Yes, lots of time involved. Drilling is the absolute last resort!
I heat both edges of the left/right window trim (carefully). After cooling, I spray WD40 between the door and trim (left/right sides). There is a slide attached to each side and the trim and slides get rusted together. The WD40 needs to soak between the trim and slide edges. I tap the top corners of the trim using a piece of wood (oak preferred) to get the trim to start sliding up.
The slides are connected to the door with three machine screws into caged square nuts. I heat the screw heads (making them red hot a couple of times). Then WD40. I have a hand-hammer-operated impact driver to get screws started (sometimes I tighten the screw a little first to break rust). You will not want to be drilling these. The screws are through the square nuts and extend out the back side of the nut-cage. Without my impact driver, I know I would mess up lots of slotted screws.
Attachments
82-A Door Window Trim 1c1.jpg (761.6 KiB) Viewed 6928 times
Before getting on the screws too hard, Eastwood now makes a tool they call a "Screw Buster" SKU 32037. It makes it possible to impact the screws out sometimes without damage so that many of the screws can even be reused. Even with this, WD-40 is the first step as it helps minimize damage to the screws. The tool comes with only a couple of bits, but a quick trip to a good hardware store or tool supply should get you the size bit that you need.
Dave H
Before getting on the screws too hard, Eastwood now makes a tool they call a "Screw Buster" SKU 32037. It makes it possible to impact the screws out sometimes without damage so that many of the screws can even be reused. Dave H
A search for the tool you indicate found nothing? Maybe you have a URL for direct access???
Before getting on the screws too hard, Eastwood now makes a tool they call a "Screw Buster" SKU 32037. It makes it possible to impact the screws out sometimes without damage so that many of the screws can even be reused. Even with this, WD-40 is the first step as it helps minimize damage to the screws. The tool comes with only a couple of bits, but a quick trip to a good hardware store or tool supply should get you the size bit that you need.
Dave H
I have the " screwbuster" tool from Eastwood. Does a great job on all the stuck screws
Here's the link https://www.eastwood.com/eastwood-screw-buster.html
I made one a few years ago, just cut the end off an air chisel tool and weld a
5/16" 1/4" drive socket on and a short piece of round stock for a handle.
i also heat and cool the screws 3x with a propane torch. i then tap the screw driver in hard with a hammer to "seat it in the screw" i think the hammer helps jar it and break the bond. hope this works. bigger the driver the better or have someone push down and put a pair of vise grips or adjustable wrench on a screwdriver with a square shaft.
I have been using an impact screwdriver - when you hit it with a hammer it causes the head to turn - theoretically. One problem is with the doors , they are relatively light so you cannot hit too hard. And on a few screws it has sheared the heads off. I have tried the heating and cooling , soaking in WD40 etc. but they are stubborn beasts. On the bright side, I did manage to get the window surrounds off today. One came fairly easy , but one side of the second one had some sort of tape down it which had really rusted in Took 2 hours of hammering, jiggling, heating and cursing but in the end success! Then couldn't get the broken glass out as it had the bottom support rusted so badly it gripped the glass like crazy!
I have been using an impact screwdriver - when you hit it with a hammer it causes the head to turn - theoretically. One problem is with the doors , they are relatively light so you cannot hit too hard. And on a few screws it has sheared the heads off. I have tried the heating and cooling , soaking in WD40 etc. but they are stubborn beasts. On the bright side, I did manage to get the window surrounds off today. One came fairly easy , but one side of the second one had some sort of tape down it which had really rusted in Took 2 hours of hammering, jiggling, heating and cursing but in the end success! Then couldn't get the broken glass out as it had the bottom support rusted so badly it gripped the glass like crazy!